Just got the result for this Course. Happy (actually delighted) to have passed with a mark of 51 (subject to formal confirmation). Have to say I had some doubts towards the end because of differing views between myself and my Tutor but these were resolved to a large extent.
Now time to make some sort of decision about third level Courses.
Tuesday, 27 November 2012
Friday, 12 October 2012
Submission sent at Last
Finally sent the material for November assessments to OCA. Following my Tutor's responses to Assignments 4 & 5 I took further advice and was fortunate enough to have a face to face tutorial of almost 2 hours that was of enormous help. It is so much easier for the parties concerned to pursue the matters that are important and directly relevant in such a meeting. Learnt a lot.
Re-worded Assignment 4 so that it was easier to read and took out the results of poor editing on my part. I was tempted to re-write the whole thing but felt that I would have been false to myself particularly in style but also in content. At the end of the day you have to go with your own judgment giving full account of the opinions of others.
I sent prints for all assignments (except 4 of course) and used Epson Premium Lustre paper as it is a finish and quality that I think adds to the final product. It was suggested that for black and white prints a Matte finish paper was more appropriate particularly where the subject matter is landscape. It was also suggested by my tutor that about half of the prints I had submitted were too subtle in approach for the purpose. I therefore decided to replace them with other images I had taken for the same project and that were more direct in their approach. Although this changed the message I had set out to portray of 'creep' rather than the 'dramatic' in the degradation of the landscape by the effects of man's work I agree that the end result has more impact because the viewer is not left guessing.
I printed the 'new' set of prints on Matte paper. It is a matter of personal decision as to whether they are 'better' printed this way but it makes viewing the images so much easier as there is no unwanted reflections.
One other matter that was discussed at the face-to-face was the blog. I have to agree that it is difficult for assessors and others to follow any particular thread that may exist in the Blog. Personally I use the Blog as a personal record both for the Projects/Exercises that are required but also as a way of marshalling my thoughts about how well I think I am doing at any particular point. For the projects/exercises I use a more formal style but for the more personal thoughts it is more a stream of consciousness form of writing. I have been thinking about whether there is a way that the needs of the assessors can be met whilst keeping the blog as a personal record. An imposed structure would work for the formal elements but is less likely to do so for the personal entries. Furthermore the problem is made worse by the chronological form of presentation imposed by the software so that there is no way to clearly link a thought process over a period of time that would be easily accessible. One possible way would be to run two blogs - one to record the required work and a second for the personal type entries where the student could be encouraged to follow through on ideas and thoughts raised earlier in a Course.
Tuesday, 4 September 2012
A Polarised Success
I was taking a series of photographs for another purpose using the lens that had a polarising filter fitted. I was not particularly thinking about the effects but when I came to work on the image in Photoshop I found this result:


Clearly I had stumbled across just the right conditions for getting such an image. The sun was low in the sky and at right angles to the shot I was taking. Bingo!!
Sunday, 2 September 2012
Getting Ready for Assessment
Spent yesterday trying to get organised for a November Assessment. Had contacted my tutor for suggestions and he pointed me in the right direction. There is a video in OCA Resources where Jose Navarro provides a series of does and don't does particularly relevant to how to submit images. Fortunately I had kept my submissions for assignments separate and not put the images into separate folders the latter method seems a good way to pee off your assessor. I also seem to have been fortunate in preparing my images (I have used hard copies to send to my Tutor throughout the Course) all at the same size and ensuring there is sufficient white space to allow them to be handled without putting fingerprints all over them.
As always there are no set rules but I think the underlying premiss is to think about the assessor and how to make his/her life as easy as possible. To look at two alternatives there is the scenario where all material is in a box but in no particular order and the one where there is a logical progression from top to bottom and all related material is contained in a sub folder. Which, as an assessor, would you prefer?
I have to confess that I am not the most organised of people so I am usually panicking because I can't find a particular piece of work that I know is there amongst the pile of work but cannot bring it to hand. Each time (I am now on my fourth Course) I promise myself that I will be much more organised but that resolution flies out the window as I rummage through my 'filing system' and stuff goes in all directions. I least I have learnt to start early in the process in getting the relevant work all together, putting it in order as far as possible and keeping it separate from everything else.
I suppose the over-arching lesson is to read what is required for Assessment at the very beginning of the Course and plan your work accordingly.
Who knows by the time I am on my final bit of work for the Degree I may be the epitome of the organised student!
Saturday, 1 September 2012
Polarising Filter

Without polariser

With Polariser
These images were taken within seconds of each other so that there was very little change in the light nor in the position of the sun which was almost at right angles to the lens. The angle was, as far as I could judge about 30 deg. Enhancement in Lightroom and Photoshop were the same.There is a noticeable difference in the two with the polarised version offering a much clearer image with little reflection off the water and more of the bottom of the river can be seen.
In pursuing this exercise I have probably taken over 50 different images polarised and unpolarised. Some worked better than others and as expected this depended largely on where the sun was in relation to the camera lens. In the best conditions there is a noticeable improvement in the image although immediately noticeable differences require a combination of factors that are not always there.
Saturday, 25 August 2012
Project 15 - Planning your Portfolio
The exercise requires four images taken throughout the year of the same spot to represent the seasons. I started in the Autumn of 2011 and took the following shot


It was not chosen originally for this purpose but because of the group of people on the right side of the image and the lines created by the preparation of the ground for sowing or at least I hoped it was for sowing! Taken using a tripod there were pointers to the location both where the photograph was taken from and within the image. The location was at the end of a narrow path leading into the field that broadened out and the shrubbery in the mid ground and on the right gave the appearance of permanency. The shot used was the result of cropping because I used a wide angle lens (24mm) to encompass as much of the scene as possible in one shot.
I returned in in January 2012 to the same spot. I had hoped for snow and one night about 2 inches fell in the area. As the location (Ickworth House) is only a couple of miles away I was able to make the journey quickly to maximise my chances of getting the desired images both for this project and the others for my portfolio.

Not surprisingly the ground markers for the location were practically indistinguishable because of the snow fall. However the shrubbery, now bare of leaves, provided enough clues to allow me to set up the tripod in roughly the same spot. Again I took a wide angle shot to allow for cropping so that the two images (Autumn and Winter) were as near as possible of the same scene. On returning home I found that I was slightly to the right of the original location but that the error was within the range that allowed for successful cropping.
The third shot was taken in the Spring of 2012 and locating the camera was not a real problem. A wide angle shot was taken with the intention of cropping. I had hoped that there would be some indication of a crop beginning to grow and although there were some tender shoots showing through they were so sparse that they were only evident if one looked closely. However the shrubbery and the trees in the distance were beginning to show their Spring foliage as can be shown by comparing the Winter and Spring shots.

The final shot of the quartet was taken in the Summer of 2012. Again location was not a problem although the growth of the summer foliage made for a quite different appearance. Using the same technique of a wide angle shot I was able to include the main elements of the image so that it was then a case of cropping to achieve the final image. The failure of the crop in the immediate foreground is not something that I would have normally included but did so because of the purpose of the exercise.

General comments - Whilst I feel that I achieved the aim of the Project which to make a record of one area throughout the Seasons and to show the differences the similarity of the images for Autumn and Spring requires some knowledge on the part of the viewer of what to expect in the two Seasons - the Autumn colours and the fresh leaf buds in the Spring. As always the photographer is very much in the hands of the elements.
What were the learning outcomes? Having lived through 72 rounds of the seasons I think it fair to say that I know that landscapes change throughout the seasons and in some landscapes quite significantly. I chose to use the same lighting conditions as far as possible because I felt that this would allow for comparisons across the seasons. 'Winter' was taken in overcast conditions as the probability of the snow lasting 'til when the sun came out was low. Would I have gained more from taking other shots in differing conditions such as rain that seemed to be the dominant weather during the early and mid-summer? The answer is that I do not know. Certainly I can speculate that the appearance of the images would have been different but in ways that would not be difficult to predict. As other exercises in the Course have shown the type of light throughout the day, the time of year and the nature of the sky has a marked difference in what the scene looks like even though the same fundamentals are there.
I assume that the photographer using film would have faced more difficulties in post-processing than I did using digital. I deliberately took wider shots than were necessary to include all the elements that were common to the four images. I then used software to crop so that the images were the same. Having done some pre-planning it was a simple task.
If I was creating a portfolio of my work throughout the Course without restrictions would I have included these images. The 'Autumn' shot would have stood a chance depending what else I wished to include but none of the others would, not because they are technically less than desired but I find them boring because they lack impact.
Tuesday, 21 August 2012
Project 34 - Using a Graduated Filter Part 2
Hopefully I have got the necessary result this time.


The first image is without a filter and the second with a filter. There is a noticeable change with the filter set just at the horizon line. Apart from the obvious darkening there is a greater differential in the tonal structure of the clouds. This most unusual cloud formation is what attracted my attention and why I took the photograph.


Again the images are no filter and with filter. The addition of the filter provides a darkening of the sky and in common with the first pair there is a greater tonal range.


Same without and with filter sequence as in the two previous sets. Here there is a significant difference in the two although I would question the wisdom of suggesting shooting directly at the sun.
General Comments:
It seems to me that adding the filter holder and filter to the camera and then adjusting the filter is, with the advent of the digital camera, a questionable practice that risks losing the shot. The opportunity to take bracketed exposures when shooting and combining the resulting images offers a much better chance of achieving the desired image. Another alternative is to use the graduated filter tools in Lightroom or Photoshop that offer far greater flexibility.
I recently watched a training video in which the presenter ( a very experienced and well known landscape photographer) was constantly adjusting the filter(s) on his landscape camera and I was left wondering whether he ever got the shot he first set out to catch. It is true that landscapes don't move but this is to ignore the very powerful effect of the changing light both over a relative lengthy period of time such as sunset or sunrise or a very short period of time where clouds are passing quickly in front of the sun.
Monday, 13 August 2012
Filters
Spent a fair time yesterday trying to do the projects relating to Graduated and Polarising filters. Made a right bog of it. Have no previous experience of Grad filters other than as part of the software in Photoshop and Lightroom so found the mounting and moving of the filter unnecessarily complex. Less problem with the polarising filter which simply screws on to the lens.
Have to admit that part of the problem was my attitude that was one of Why am I doing this? For most of the problems that filters are designed to overcome there are other ways available such as two exposures or bracketed exposure of the same scene or using the filters in software. Still I suppose I must persevere so will have another attempt when the weather is suitable.
Have to admit that part of the problem was my attitude that was one of Why am I doing this? For most of the problems that filters are designed to overcome there are other ways available such as two exposures or bracketed exposure of the same scene or using the filters in software. Still I suppose I must persevere so will have another attempt when the weather is suitable.
Wednesday, 8 August 2012
Project 37 - ways of dramatising a landscape
Inherently spectacular subjects - often these subjects are those elements that leave us in awe and aware of our own puny size in a world that includes 'giants' of all kinds. Far from being 'imaginary' the one that stands out in my memory and that provided some spectacular images was a visit to Niagara Falls. One only has to stand at the top of the falls to feel the sheer power of water. To experience the effect a trip on one of the Maids of the Mist boats that take you almost into the heart of the cascading water providess the sense of grandeur and spectacle.
An extreme focal length of lens: very wide angle or long telephoto - here we are able to create a perspective that by shifting relationships between elements create patterns or views that capture the imagination. The very wide angle lens offers the opportunity to include foreground elements that take us into the image whilst retaining focus across the range. The telephoto lens compresses the picture and draws together elements that in reality may be some distance apart. On a holiday in Tunisia I was fortunate to go on a two day safari into the Sahara desert. On the second day we were woken early so that we could be in position to see dawn breaking. We climbed a large sand dune with some difficulty (only to be met by the ubiquitous coffee and Coke seller at the top) and as the sun rose it revealed mile after mile of sand dunes. The combination of the early morning light and the use of a telephoto lens produced some unforgettable images as the dunes seemed like waves rushing towards the shore.
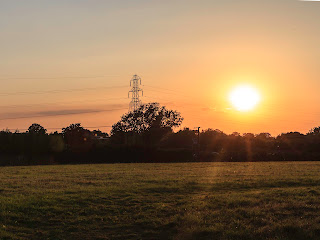
Rich colours at sunrise and sunset - my personal preference is for the horizon to provide some interest such as buildings, mountains or trees that give form in silhouette as the sun rises behind them. Alternatively the rising or setting sun over the sea or large expanses of water can offer a pathway of light that is both an 'in' to the photograph or an important element of the image itself.
Back lighting - I am not sure that this produces drama in a landscape although one could imagine a combination of landscape and sunrise/setting that gave shafts of light apparently rising from the mountains or other features which would add drama to the overall image particularly if the light catches the underneath of clouds in a darkening sky.
Unusual composition - Here the effect is one of surprise or possibly discomfort as the composition challenges the viewer's view of the world. The placing of a familiar object in an unfamiliar relationship with its surroundings such as shooting very low with a small pillar or piece of street furniture that appears much larger than in reality because of its relative size that would dominate the foreground.
Mist - Mist offers a range of possibilities both in partly hiding a feature such as foothills or only allowing the top of things such as trees to appear clearly in the picture. Here the drama is the mystery or the subtle changes caused by the softening effect of the mist on normally harsh features such as hills or mountains.
Snow - Changes the shape of objects and the nature of the landscape and can be of itself a dramatic subject for a photograph such as wind-carved drifts that take on a form that is surrealistic.The nature of the light also changes bringing a sparkling clarity.
Frost - After a severe frost and with a low temperature trees become glazed and if you are very lucky have icicles hanging like Christmas decorations. I was driving along the A57 in Lincolnshire when the roadside for about half a mile presented this sort of image.
Rain - Although often seen as the photographer's enemy sometimes it offers conditions that make for great images. Drops of rain on grass or leaves and the limited vision across the rainswept land provide many opportunities for the unexpected image. Almost any landscape looks and seems to 'feel' different when it is raining.
Subdued - The effect of mist or rain or the rays of the sunrise or sunset can produce a soft image where the drama is understated but nevertheless has an impact comparable to the more normal views of any of those things mentioned above. My own personal favourite is a shot I took across an expanse of water looking towards the foothills of a mountain range. The sun was setting at 90 degrees to the line of the photograph and the valleys between the foothills were covered in mist. For probably less than a minute the light and other elements combined to create a picture that was reminiscent of Oriental art. For once I was in the right place at the right time and had the camera in my hand.
An extreme focal length of lens: very wide angle or long telephoto - here we are able to create a perspective that by shifting relationships between elements create patterns or views that capture the imagination. The very wide angle lens offers the opportunity to include foreground elements that take us into the image whilst retaining focus across the range. The telephoto lens compresses the picture and draws together elements that in reality may be some distance apart. On a holiday in Tunisia I was fortunate to go on a two day safari into the Sahara desert. On the second day we were woken early so that we could be in position to see dawn breaking. We climbed a large sand dune with some difficulty (only to be met by the ubiquitous coffee and Coke seller at the top) and as the sun rose it revealed mile after mile of sand dunes. The combination of the early morning light and the use of a telephoto lens produced some unforgettable images as the dunes seemed like waves rushing towards the shore.
Rich colours at sunrise and sunset - my personal preference is for the horizon to provide some interest such as buildings, mountains or trees that give form in silhouette as the sun rises behind them. Alternatively the rising or setting sun over the sea or large expanses of water can offer a pathway of light that is both an 'in' to the photograph or an important element of the image itself.
Back lighting - I am not sure that this produces drama in a landscape although one could imagine a combination of landscape and sunrise/setting that gave shafts of light apparently rising from the mountains or other features which would add drama to the overall image particularly if the light catches the underneath of clouds in a darkening sky.
Unusual composition - Here the effect is one of surprise or possibly discomfort as the composition challenges the viewer's view of the world. The placing of a familiar object in an unfamiliar relationship with its surroundings such as shooting very low with a small pillar or piece of street furniture that appears much larger than in reality because of its relative size that would dominate the foreground.
Mist - Mist offers a range of possibilities both in partly hiding a feature such as foothills or only allowing the top of things such as trees to appear clearly in the picture. Here the drama is the mystery or the subtle changes caused by the softening effect of the mist on normally harsh features such as hills or mountains.
Snow - Changes the shape of objects and the nature of the landscape and can be of itself a dramatic subject for a photograph such as wind-carved drifts that take on a form that is surrealistic.The nature of the light also changes bringing a sparkling clarity.
Frost - After a severe frost and with a low temperature trees become glazed and if you are very lucky have icicles hanging like Christmas decorations. I was driving along the A57 in Lincolnshire when the roadside for about half a mile presented this sort of image.
Rain - Although often seen as the photographer's enemy sometimes it offers conditions that make for great images. Drops of rain on grass or leaves and the limited vision across the rainswept land provide many opportunities for the unexpected image. Almost any landscape looks and seems to 'feel' different when it is raining.
Subdued - The effect of mist or rain or the rays of the sunrise or sunset can produce a soft image where the drama is understated but nevertheless has an impact comparable to the more normal views of any of those things mentioned above. My own personal favourite is a shot I took across an expanse of water looking towards the foothills of a mountain range. The sun was setting at 90 degrees to the line of the photograph and the valleys between the foothills were covered in mist. For probably less than a minute the light and other elements combined to create a picture that was reminiscent of Oriental art. For once I was in the right place at the right time and had the camera in my hand.
Project 36 - defining a style
Eliot Porter
Although known as a Fine Art photographer Porter was, at heart, a naturalist and scientist having studied Chemical Engineering and Medicine. His scientific background is apparent in his use of the dye transfer process that allows for great control over the colour process. (For an explanation of this process see www.cartermuseum.org/collection.php?sec=dyetrans). ) His naturalist inclinations are evident in his photographic studies of birds and in his landscape photography. There is an elegance about his photographs which, combined with his mastering of colour production, make it easy to see why he is considered a Fine Art Photographer.
Dorothea Lange
Beginning her career as a portrait photographer Lange is best known for her work recording the Depression era in America. She was employed by the Resettlement Administration (later to become the Farm Security Administration FSA) her images concentrate on the individual or families suffering the worst effects of the Depression. Her early work as a portrait photographer is evident in her work during this time with stunning images of people facing a hopeless future. The underlying simplicity and the use of black and white grainy film underlines the message she is attempting to put across. Similar work can be found in her photographic record of Japanese Americans being forcibly evacuated to Resettlement Camps following Pearl Harbour in 1941.
Walker Evans
Evans goal as a photographer was to offer photographs that would "liberate, be authoritative , and transcendental". Like Dorothea Lange he was employed by the FSA and produced similar work providing images of rural poverty. He used a 10" x 8" large format camera and the qualities that such a camera provides is evident in his photographs. His images range from straightforward portraiture through images that used heavily cropped images such as the legs of four men from the knees down to buildings. Like Lange he was a photographer of conscience.
Ansel Adams
Adams work is notable above all else for his control of focus, heightened contrast, precise exposure and his skills in the darkroom. Creator of the 'Zone System' to maximise tonal contrast he used a large format camera which offered, for him, the best chance of achieving his aims. His photographs of Yosemite National Park are probably his 'famous' ones but his real impact is created by his almost obsessive attention to detail. He argued that the photographer should pre-visualise the image he wanted to have before actually using the camera.
General Observation.
One has to ask oneself whether there is, or ever could be, a unique style that would be recognised as the work of one person without attribution. Whilst Adam's images of Yosemite are almost universally recognised as his work there is still the requirement that in some way there should be authentication of any image as his work. The best that can be said without this authentication would be to say the image was in the style of..... If you look at the work of Lange and Evans there is insufficient difference in their work for the FSA to say which photographer was responsible. Clearly where an image has become synonymous with a particular photographer, such as Lange's images of the ShareCroppers family, then recognition is immediate but this is not the same as being shown an image and asked to state who was the photographer.
Tuesday, 7 August 2012
Project 30 Wide-angle views - near and far

The first image was taken hand-held sitting on the ground and steadying the camera on my thighs. I followed this up by placing the camera on a convenient flat rock immediately in front of me and shooting in the usual way (manual pressure on the button).

I left the camera on the same rock but this time used a wireless remote control to avoid any possible 'shake'. I got the following image:
All three shots were taken within a short space of time and there was little if any change in the light. Close examination of the three images shows little variation in the 'sharpness' although this probably has a lot to do with the stabilising feature in the lens (Tamron 28 - 300). Without this facility it would have been necessary to either use a 'gorilla' tripod or something like a bean bag to provide stability and certainly the remote control would have been essential.
For the next couple of pictures I turned to my left to obtain a different view. I achieved the following results:


The first of these two images was taken standing up which produced the limited view of the loch side. In the second the camera is placed on a convenient rock and the remote control used.
General
Having done the exercise the results seem obvious but it reminded me that taking photographs standing up limits the variety of shots available. Certainly I personally find the second of the two images immediately above more satisfying than the first. I was fortunate to have conveniently placed flat rocks upon which I could place the camera otherwise the results would have been difficult to obtain. I had not taken my 'gorilla' pod which shows a lack of forward planning and I hadn't taken a jacket that I could have used as a makeshift bean bag. The latter 'decision' was a mistake because the other thing I learned was that the many tales about Scottish midges are decidedly true!
In order to get the view I was aiming for I used 'live view' although in all honesty I was largely relying upon educated guesswork on what the likely results would be.
Thursday, 2 August 2012
Project 32 telephoto views -a variety of images

All three images were taken from the same point. In this first image I wanted to include the rocks (part of a breakwater) in the shot with the small rocky island in the mid-ground and the large island (Skye) in the background. The lens used was at 28mm for this shot which gave a wide angle that included the headland that comes into the image from the right about at the mid-point of the image.

The second image was taken with the lens set at 42mm which has the effect of only moving the viewer a small part of the way into the picture. I did try a number of other settings up to 100mm but my personal preference was for this particular one. In the others the small rocky island became very much the dominant part of the picture and foreshortened the distance between that island and the larger one.

In this final image I have used the small island to provide the foreground interest and to emphasise the distance from the camera of the larger island.
Project 27 - By the light of the Moon


All three were taken with the camera on a tripod with a wireless remote control fitted to avoid any camera shake with the necessarily long exposure time of 20 seconds. All three were shot with the aperture set at f3.5 which is the widest aperture available on the lens used (Tamron 28 - 300mm) with a setting of 28mm.
It was a clear night with a full moon and the images were shot at approximately 2215 hours on Wednesday 1st August.
With the camera set to manual the only changes made was to the ISO (100 for the first; 200 for the second and 400 for the third image.
I then turned the camera round to take the following three images:


The same camera set up was used although the images from top to bottom have ISO settings of 400; 200 and 100.
I had looked at a number of pages of information on the Internet to make a preliminary calculation of the shutter speed and used the average of 20 seconds. I checked the initial image and found the result acceptable for the purpose of the experiment and stuck with the 20 seconds throughout.
The first set that is obviously looking away from the house were a surprise to me particularly the ISO 400 shot that clearly has colour information. The shadows that can be seen are moon shadows and the lighting of the area is solely the effect of the moon. As is stated in the Course material our eyes do not see colour in such situations and yet obviously the camera's sensors capture the colour elements albeit somewhat muted. In Photoshop I did move the Exposure slider to increase the level and it became almost like a summer's day!
The reason for turning the camera round was to catch the effect of the moonlight on the house. To me, although my eyes had adjusted to the darkness, the house looked dark with the only obvious light being from the Garden lights. The nearest image to what I was 'seeing' was the ISO 100 image and even then there is more light than I was conscious of. In the ISO 400 version the amount of light was totally unexpected and the change in the colour of the sky was equally a surprise. The smudge of light left of centre in the picture just above the horizon at that point is a plane coming in to land at Stansted that is probably 30 miles away.
Project 26 - Shooting the Moon

The first image was taken with settings 1/250sec f7.1. The moon was high in the sky as it was necessary for the sky to darken. At moonrise the moon was barely visible.

The second image was taken with settings of 1/125sec f5.6. some two minutes after the first image.
As an exercise this was frustrating largely because of the weather that meant there was rarely a clear sky when the moon was full. On a number of occasions I had set up my camera ready only to find the cloud cover increasing.
I found the 'landscape' element of the project something of a problem. Using Photoshop or Lightroom it would have been possible to lighten the landscape element and I also considered creating a montage with the moon and a landscape but felt that neither of these options were not in the spirit of the project.
Tuesday, 31 July 2012
Project 40 - coloured filters with black and white film
Decided to opt out of this project as I do not use film. If I take images that I plan to use as black and white I always shoot in colour and then use the range of facilities in the software that I use to make the conversion.
Project 41 - Grain
I do not shoot film nor do I have a film camera. Grain is usually described as 'noise' in digital photography and generally is seen as undesirable but not in all cases. The suppression of noise is part of the algorithms in the camera that I use (Canon 5D Mk II) and I have successfully taken images at equivalent ISO's of 1600 and in ideal conditions 2500. I normally shoot at ISO 400 although if doing street photography I can use an ISO of 1600 without obvious signs of noise. At the extreme limits (ISO 25000) normal viewing is not noticeably noisy but when zooming in to shadow areas there are usually problems with colour noise.
I use Lightroom 4 and Adobe Photoshop CS6 to enhance images and both, but particularly Lightroom, have noise suppression algorithms that work extremely well. In CS6 there is a filter that will add noise where it is seen to be desirable. I also use Silver Efex Pro 2 to create monochrome images where I feel noise can be added to good effect and the programme offers a range of opportunities.
I use Lightroom 4 and Adobe Photoshop CS6 to enhance images and both, but particularly Lightroom, have noise suppression algorithms that work extremely well. In CS6 there is a filter that will add noise where it is seen to be desirable. I also use Silver Efex Pro 2 to create monochrome images where I feel noise can be added to good effect and the programme offers a range of opportunities.
Project 42 - man-made landscape

The first image is one that is well known to many of us and normally we would consider it a 'natural' landscape. Yet there is plenty of evidence that it is almost completely man-made. The fence in front of the image and the walls that divide up the scene are indicators of the product of the work of man. There is very little countryside in the United Kingdom that has not, in some way, been impacted upon by human beings over the centuries and it is often difficult to distinguish between what is natural and what is man made.

The second image was taken looking across Loch Eil in Scotland. It is included because the majority of what can be seen is the work of man. The Loch itself is a natural water feature but the boat is evidence of the presence of man. Perhaps not so obvious is the fish farm on the opposite side of the Loch and may not be noticed apart from the buoys and stage. However the main reason for taking this image is the far bank. Whilst the evidence of working is obvious where the forest has been cleared the reality is that everything from the waters edge to the tree line is man-made. Large swathes of Scotland have been forested to support the timber industry and whilst this may look natural at first glance the lack of variety in the trees and plants is a giveaway.

The final image is the 'obvious' landscape clearly showing the effect of man's wish to extract what is deemed to be valuable. Here the buildings and the adjacent quarry with its pile of broken or crushed rock can leave little doubt. However nature has a way of taking back land that has been abandoned by man and it is easy in some cases to not see that the landscape is man-made.
General
This was an interesting exercise because of the need to find examples of man made landscape that on first glance was not self-evident such as farm land that looks, and probably has been, there for hundreds of years. We too often take for granted that something is natural because it is so familiar to us and apparently unchanging. We assume that it has been like that before man made his mark upon the earth.
Preliminary Work for Assignment 5
Hopefully I have got my head around the difference between "in the style of" and "informed by" although I still have some lingering doubts. Spent last week in the North of England and the South-West of Scotland on a trip to photograph shots that will be useful in meeting the needs of assignment 5. Spent most of yesterday sorting them and trying to reach a final 12 from this work and some earlier work that I have done.
I have decided that, as Adams never used colour in his photographs, part of the 'information' I wish to bring into my submission will be the use of black and white images. I therefore, whilst selecting the images, temporarily converted them using the black and white conversion available in LightRoom. Some images are better/worse in monochrome although as always this is a personal matter. Further the algorithm used adds contrast to give the image "oomph" so the results were slightly at odds with the second piece of 'information' I gleaned from the study of the work of Adams. The tonal range in most of his images is limited. Such a limited range underpins his overall message about the damage caused by man to the 'natural' American West. I am still undecided whether to artificially introduce this element into the images that I have taken but currently my thinking is to test it on a image by image basis.
Adams also cropped his images, either in camera or later, without too much regard to the edges of buildings. I could not decide whether this was a deliberate ploy or something that just happened. It certainly 'jars' the eye of someone who has been raised on the principle that it is not something that you do. Whether it adds or detracts from the image is another matter. Examples of this composition are the photographs on the front covers of "What we Bought: The New World"; "The New West" and "Prairie" all books by Robert Adams. Again it is something that I plan to test on a case-by-case basis.
Friday, 13 July 2012
Project 31 - Telephoto views - Compressing planes


The three images were shot using a 70 - 300mm lens at f9. Focal lengths were varied and respectively are 300mm; 108mm and 70mm. All were shot using a tripod from the same position.
The top image forces the viewer to focus on the windmill as it is central to the image. The distance between the camera (approximately half a mile) is compressed to such an extent that the hedgerow, the roof of the house and the windmill seem to be relatively close together whereas they are separated by quite some distance. By zooming in on the windmill the surrounding countryside is 'cut' from the picture giving limited information about the environment around it.
The second image still keeps the windmill centred in the image but now more of the surrounding countryside is included. However the compression of the planes continues. The white house that is close by the windmill appears to be quite close to the red roof in middle distance. In reality the two are separated by about 500 yards.
The third image continues with the windmill in the middle but includes much more of the country side. The foreground hedge and scrubland moves the viewer away from the windmill but the compression of the planes in the middle ground continues. A sense of depth in the rest of the image is created by our knowledge that the smaller an object is in comparison with its expected size the more likely it is some distance away.
The effect of the telephoto lens is created because of the way we 'see' images based upon our experience and memories. We make assumptions about the size of an object (say the house to the right of the windmill that can clearly be seen through the trees) and from that deduce that it is further away if it is smaller than expected. There is no real way to know whether this is true. The house may be a child's doll's house (it isn't as far as I know) and may be closer to us than we believe.
Friday, 6 July 2012
Project 33 - Using a Tripod


The second image was taken within 1 minute of the first handheld with camera settings the same although shutter speed was 1/200.
Close examination of the two images show no discernible difference even at an enlargement of 300%. the main area of examination was of the vent grill to the bottom right of the image and the edges of the stairs.
I know from experience that, for me, using a shutter speed of less than 1/125 when the camera is hand held will show evident signs of camera shake. I allow for this by normally using an ISO of 400 (there is no discernible difference in grain or chromatic aberration to those found at lower ISO) wherever possible which in normal circumstances gives the desired shutter speed. I will try a series of combinations of ISO, shutter speed and aperture value if a tripod is not an option constantly aiming to keep the shutter speed at 1/125 or above.
For images that I know will be enlarged up to A3 size I will use camera settings that give a higher shutter speed or set the shutter speed and let the camera decide on the aperture value. If this does not produce the desired result I will use Manual.
It is impossible to make an accurate judgement of the amount of 'shake' by using the LCD screen on the rear of the camera so I rely upon experience and the bracketing of images to achieve the best image possible.
Tuesday, 3 July 2012
Looking Ahead
I have Assignment 4 in draft completed. Need to leave it alone for a short time before giving it it's final polish.
Now thinking about the final assignment. The subject of Assignment 4 was Robert Adams so I am committed to producing images in his style. Fortunately it is not too difficult to decide what his style is about being a look at the depredation of the American West through the presence of man. His style is to use a very limited range of tones in his black and white photographs, he eschewed colour photography, and almost without exception his skies would be considered to be 'blown out' in present day thinking.
He also has a distinctive approach to the 'cropping' of images cutting off the edges or roofs of buildings. He does not include human beings in his images very often and those that he does often are facing away from us.
One of his pet hates is the 'tacky' housing so typical of the American West across the vast tracts of what was once wilderness. Almost invariable clapboard we have very few examples of the same thing in this Country. However there is a similar 'blot' on the landscape - the mobile homes, the residential caravan and park homes. It is these that I will look to for some of the images. I would assume that the nearest equivalent we have to wilderness and prairies is the moorlands in Scotland and the South West of England. Another alternative could be the sand dunes that are around our coasts that in some cases offer a very similar landscape.
I feel that I will have to develop a series of 'plans' as I find examples of what I am looking for in my journeys around the Country.
Saturday, 23 June 2012
Assignment 4 Preliminary Work
Spent the last week or so researching material. Chose Robert Adams as the subject. Not really sure why other than his photography appealed more to me than the other suggested subjects. 'Liking' or 'disliking' particular works seems to be a gut reaction probably triggered by other memories. Sometimes it is an error to over-analyse a reaction because to do that we have to rationalise something that by its nature is irrational. We are left dissecting the image to the point that it no longer exists as a whole or we allow ourselves to be persuaded by the views of others. It is a noticeable element of current photography that what is seen as acceptable is remarkably narrow and is often little more than todays fashion.
It is highly unlikely the photographs produced by Robert Adams, if a newcomer, would be exhibited today as landscapes went out of fashion a few years ago and only just are being re-considered. I recall a lecture by Peter Paterson a landscape photographer whose work, for me was brilliant and at times breathtaking. He showed examples of his earlier work and then by progression his latest work. There had been a noticeable shift in style. When asked why this had occurred he said that he found that, in order to get his work accepted for exhibitions, he had had to change to a 'modern' style using all the tricks of the software available. Personally I felt that this was a great loss.
For someone who is so well known there is very little external assessment of his photography. (It is interesting that the Wikipedia entry is is seen as something that needs external input as most of the material is considered to have been entered by someone close to the subject). Maybe this is because he is a living artist or possibly because he is an accomplished writer who you would take on at your peril. Whatever the cause one is left with the task of trying to build a picture from his own utterances and writing. Fortunately there is a mass of material as he is a prolific writer of books. Instead of scratching around trying to find something some one said or did for clues the task is to sift through the mass of material.
Two of his books "Beauty in Photography" and"Why People Photograph" seem to offer a lot of information about the influences that bear upon his work yet contain no examples of his work. As he argues it is unreasonable to be a critic of his work if one does not look at his photographs and that is my next area of work.
Saturday, 16 June 2012
Another shot at Sky/Clouds
I was browsing through some photographs that I had taken within the past few months and came across this set taken at Wicken Fen Cambridge. They were all taken on the same day and I was struck by the variation in cloud formations across a period of about 3 hours.


Looking at the shots and using the land as a clue I took these by looking in different directions. To state the obvious sometimes the best shots are just over your shoulder. I would like to take credit for having thought of this at the time but I was more interested in the landscape at the time and the cloud formation variance was a matter of chance. Hopefully I'll think about this next time I am out and about.
I also took the opportunity to include more of the land so that the images work as landscape images as required by the Course material. I rather ignored this in my last blog as I was more interested in the cloud formations. I guess at the end of the day it is a matter of personal judgement as to what works best in any particular image.
Tuesday, 12 June 2012
Project 24 Clouds and Sky


Here are a variety of images taken at various points over the past few months. The frequently changing weather has offered plenty of opportunity to vary the cloud formation and where this has been unusual I have concentrated on the sky and in part ignored the instructions to make them truly landscape. It would have been easy to create a landscape picture by combining images but this, to me, seemed not to be in the spirit of the Project.
Subscribe to:
Comments (Atom)