Just got the result for this Course. Happy (actually delighted) to have passed with a mark of 51 (subject to formal confirmation). Have to say I had some doubts towards the end because of differing views between myself and my Tutor but these were resolved to a large extent.
Now time to make some sort of decision about third level Courses.
Tuesday, 27 November 2012
Friday, 12 October 2012
Submission sent at Last
Finally sent the material for November assessments to OCA. Following my Tutor's responses to Assignments 4 & 5 I took further advice and was fortunate enough to have a face to face tutorial of almost 2 hours that was of enormous help. It is so much easier for the parties concerned to pursue the matters that are important and directly relevant in such a meeting. Learnt a lot.
Re-worded Assignment 4 so that it was easier to read and took out the results of poor editing on my part. I was tempted to re-write the whole thing but felt that I would have been false to myself particularly in style but also in content. At the end of the day you have to go with your own judgment giving full account of the opinions of others.
I sent prints for all assignments (except 4 of course) and used Epson Premium Lustre paper as it is a finish and quality that I think adds to the final product. It was suggested that for black and white prints a Matte finish paper was more appropriate particularly where the subject matter is landscape. It was also suggested by my tutor that about half of the prints I had submitted were too subtle in approach for the purpose. I therefore decided to replace them with other images I had taken for the same project and that were more direct in their approach. Although this changed the message I had set out to portray of 'creep' rather than the 'dramatic' in the degradation of the landscape by the effects of man's work I agree that the end result has more impact because the viewer is not left guessing.
I printed the 'new' set of prints on Matte paper. It is a matter of personal decision as to whether they are 'better' printed this way but it makes viewing the images so much easier as there is no unwanted reflections.
One other matter that was discussed at the face-to-face was the blog. I have to agree that it is difficult for assessors and others to follow any particular thread that may exist in the Blog. Personally I use the Blog as a personal record both for the Projects/Exercises that are required but also as a way of marshalling my thoughts about how well I think I am doing at any particular point. For the projects/exercises I use a more formal style but for the more personal thoughts it is more a stream of consciousness form of writing. I have been thinking about whether there is a way that the needs of the assessors can be met whilst keeping the blog as a personal record. An imposed structure would work for the formal elements but is less likely to do so for the personal entries. Furthermore the problem is made worse by the chronological form of presentation imposed by the software so that there is no way to clearly link a thought process over a period of time that would be easily accessible. One possible way would be to run two blogs - one to record the required work and a second for the personal type entries where the student could be encouraged to follow through on ideas and thoughts raised earlier in a Course.
Tuesday, 4 September 2012
A Polarised Success
I was taking a series of photographs for another purpose using the lens that had a polarising filter fitted. I was not particularly thinking about the effects but when I came to work on the image in Photoshop I found this result:


Clearly I had stumbled across just the right conditions for getting such an image. The sun was low in the sky and at right angles to the shot I was taking. Bingo!!
Sunday, 2 September 2012
Getting Ready for Assessment
Spent yesterday trying to get organised for a November Assessment. Had contacted my tutor for suggestions and he pointed me in the right direction. There is a video in OCA Resources where Jose Navarro provides a series of does and don't does particularly relevant to how to submit images. Fortunately I had kept my submissions for assignments separate and not put the images into separate folders the latter method seems a good way to pee off your assessor. I also seem to have been fortunate in preparing my images (I have used hard copies to send to my Tutor throughout the Course) all at the same size and ensuring there is sufficient white space to allow them to be handled without putting fingerprints all over them.
As always there are no set rules but I think the underlying premiss is to think about the assessor and how to make his/her life as easy as possible. To look at two alternatives there is the scenario where all material is in a box but in no particular order and the one where there is a logical progression from top to bottom and all related material is contained in a sub folder. Which, as an assessor, would you prefer?
I have to confess that I am not the most organised of people so I am usually panicking because I can't find a particular piece of work that I know is there amongst the pile of work but cannot bring it to hand. Each time (I am now on my fourth Course) I promise myself that I will be much more organised but that resolution flies out the window as I rummage through my 'filing system' and stuff goes in all directions. I least I have learnt to start early in the process in getting the relevant work all together, putting it in order as far as possible and keeping it separate from everything else.
I suppose the over-arching lesson is to read what is required for Assessment at the very beginning of the Course and plan your work accordingly.
Who knows by the time I am on my final bit of work for the Degree I may be the epitome of the organised student!
Saturday, 1 September 2012
Polarising Filter

Without polariser

With Polariser
These images were taken within seconds of each other so that there was very little change in the light nor in the position of the sun which was almost at right angles to the lens. The angle was, as far as I could judge about 30 deg. Enhancement in Lightroom and Photoshop were the same.There is a noticeable difference in the two with the polarised version offering a much clearer image with little reflection off the water and more of the bottom of the river can be seen.
In pursuing this exercise I have probably taken over 50 different images polarised and unpolarised. Some worked better than others and as expected this depended largely on where the sun was in relation to the camera lens. In the best conditions there is a noticeable improvement in the image although immediately noticeable differences require a combination of factors that are not always there.
Saturday, 25 August 2012
Project 15 - Planning your Portfolio
The exercise requires four images taken throughout the year of the same spot to represent the seasons. I started in the Autumn of 2011 and took the following shot


It was not chosen originally for this purpose but because of the group of people on the right side of the image and the lines created by the preparation of the ground for sowing or at least I hoped it was for sowing! Taken using a tripod there were pointers to the location both where the photograph was taken from and within the image. The location was at the end of a narrow path leading into the field that broadened out and the shrubbery in the mid ground and on the right gave the appearance of permanency. The shot used was the result of cropping because I used a wide angle lens (24mm) to encompass as much of the scene as possible in one shot.
I returned in in January 2012 to the same spot. I had hoped for snow and one night about 2 inches fell in the area. As the location (Ickworth House) is only a couple of miles away I was able to make the journey quickly to maximise my chances of getting the desired images both for this project and the others for my portfolio.

Not surprisingly the ground markers for the location were practically indistinguishable because of the snow fall. However the shrubbery, now bare of leaves, provided enough clues to allow me to set up the tripod in roughly the same spot. Again I took a wide angle shot to allow for cropping so that the two images (Autumn and Winter) were as near as possible of the same scene. On returning home I found that I was slightly to the right of the original location but that the error was within the range that allowed for successful cropping.
The third shot was taken in the Spring of 2012 and locating the camera was not a real problem. A wide angle shot was taken with the intention of cropping. I had hoped that there would be some indication of a crop beginning to grow and although there were some tender shoots showing through they were so sparse that they were only evident if one looked closely. However the shrubbery and the trees in the distance were beginning to show their Spring foliage as can be shown by comparing the Winter and Spring shots.

The final shot of the quartet was taken in the Summer of 2012. Again location was not a problem although the growth of the summer foliage made for a quite different appearance. Using the same technique of a wide angle shot I was able to include the main elements of the image so that it was then a case of cropping to achieve the final image. The failure of the crop in the immediate foreground is not something that I would have normally included but did so because of the purpose of the exercise.

General comments - Whilst I feel that I achieved the aim of the Project which to make a record of one area throughout the Seasons and to show the differences the similarity of the images for Autumn and Spring requires some knowledge on the part of the viewer of what to expect in the two Seasons - the Autumn colours and the fresh leaf buds in the Spring. As always the photographer is very much in the hands of the elements.
What were the learning outcomes? Having lived through 72 rounds of the seasons I think it fair to say that I know that landscapes change throughout the seasons and in some landscapes quite significantly. I chose to use the same lighting conditions as far as possible because I felt that this would allow for comparisons across the seasons. 'Winter' was taken in overcast conditions as the probability of the snow lasting 'til when the sun came out was low. Would I have gained more from taking other shots in differing conditions such as rain that seemed to be the dominant weather during the early and mid-summer? The answer is that I do not know. Certainly I can speculate that the appearance of the images would have been different but in ways that would not be difficult to predict. As other exercises in the Course have shown the type of light throughout the day, the time of year and the nature of the sky has a marked difference in what the scene looks like even though the same fundamentals are there.
I assume that the photographer using film would have faced more difficulties in post-processing than I did using digital. I deliberately took wider shots than were necessary to include all the elements that were common to the four images. I then used software to crop so that the images were the same. Having done some pre-planning it was a simple task.
If I was creating a portfolio of my work throughout the Course without restrictions would I have included these images. The 'Autumn' shot would have stood a chance depending what else I wished to include but none of the others would, not because they are technically less than desired but I find them boring because they lack impact.
Tuesday, 21 August 2012
Project 34 - Using a Graduated Filter Part 2
Hopefully I have got the necessary result this time.


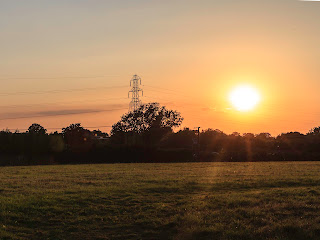


The first image is without a filter and the second with a filter. There is a noticeable change with the filter set just at the horizon line. Apart from the obvious darkening there is a greater differential in the tonal structure of the clouds. This most unusual cloud formation is what attracted my attention and why I took the photograph.


Again the images are no filter and with filter. The addition of the filter provides a darkening of the sky and in common with the first pair there is a greater tonal range.


Same without and with filter sequence as in the two previous sets. Here there is a significant difference in the two although I would question the wisdom of suggesting shooting directly at the sun.
General Comments:
It seems to me that adding the filter holder and filter to the camera and then adjusting the filter is, with the advent of the digital camera, a questionable practice that risks losing the shot. The opportunity to take bracketed exposures when shooting and combining the resulting images offers a much better chance of achieving the desired image. Another alternative is to use the graduated filter tools in Lightroom or Photoshop that offer far greater flexibility.
I recently watched a training video in which the presenter ( a very experienced and well known landscape photographer) was constantly adjusting the filter(s) on his landscape camera and I was left wondering whether he ever got the shot he first set out to catch. It is true that landscapes don't move but this is to ignore the very powerful effect of the changing light both over a relative lengthy period of time such as sunset or sunrise or a very short period of time where clouds are passing quickly in front of the sun.
Subscribe to:
Comments (Atom)