Wednesday, 6 June 2012

Project 19 - Choosing the Moment


This is the first in a series of images taken as the sun was setting. The whole series was taken in a little over 14 minutes. This particular image was taken at 20.24.19.


Taken just 34 seconds after the first image it was this particular image that made me decide to take the series as there was a noticeable change in the sky which made me think that the results could be good.


Time elapsed is 34 seconds during which time the sky has changed significantly but the sun can just be seen over the edge of the hills.
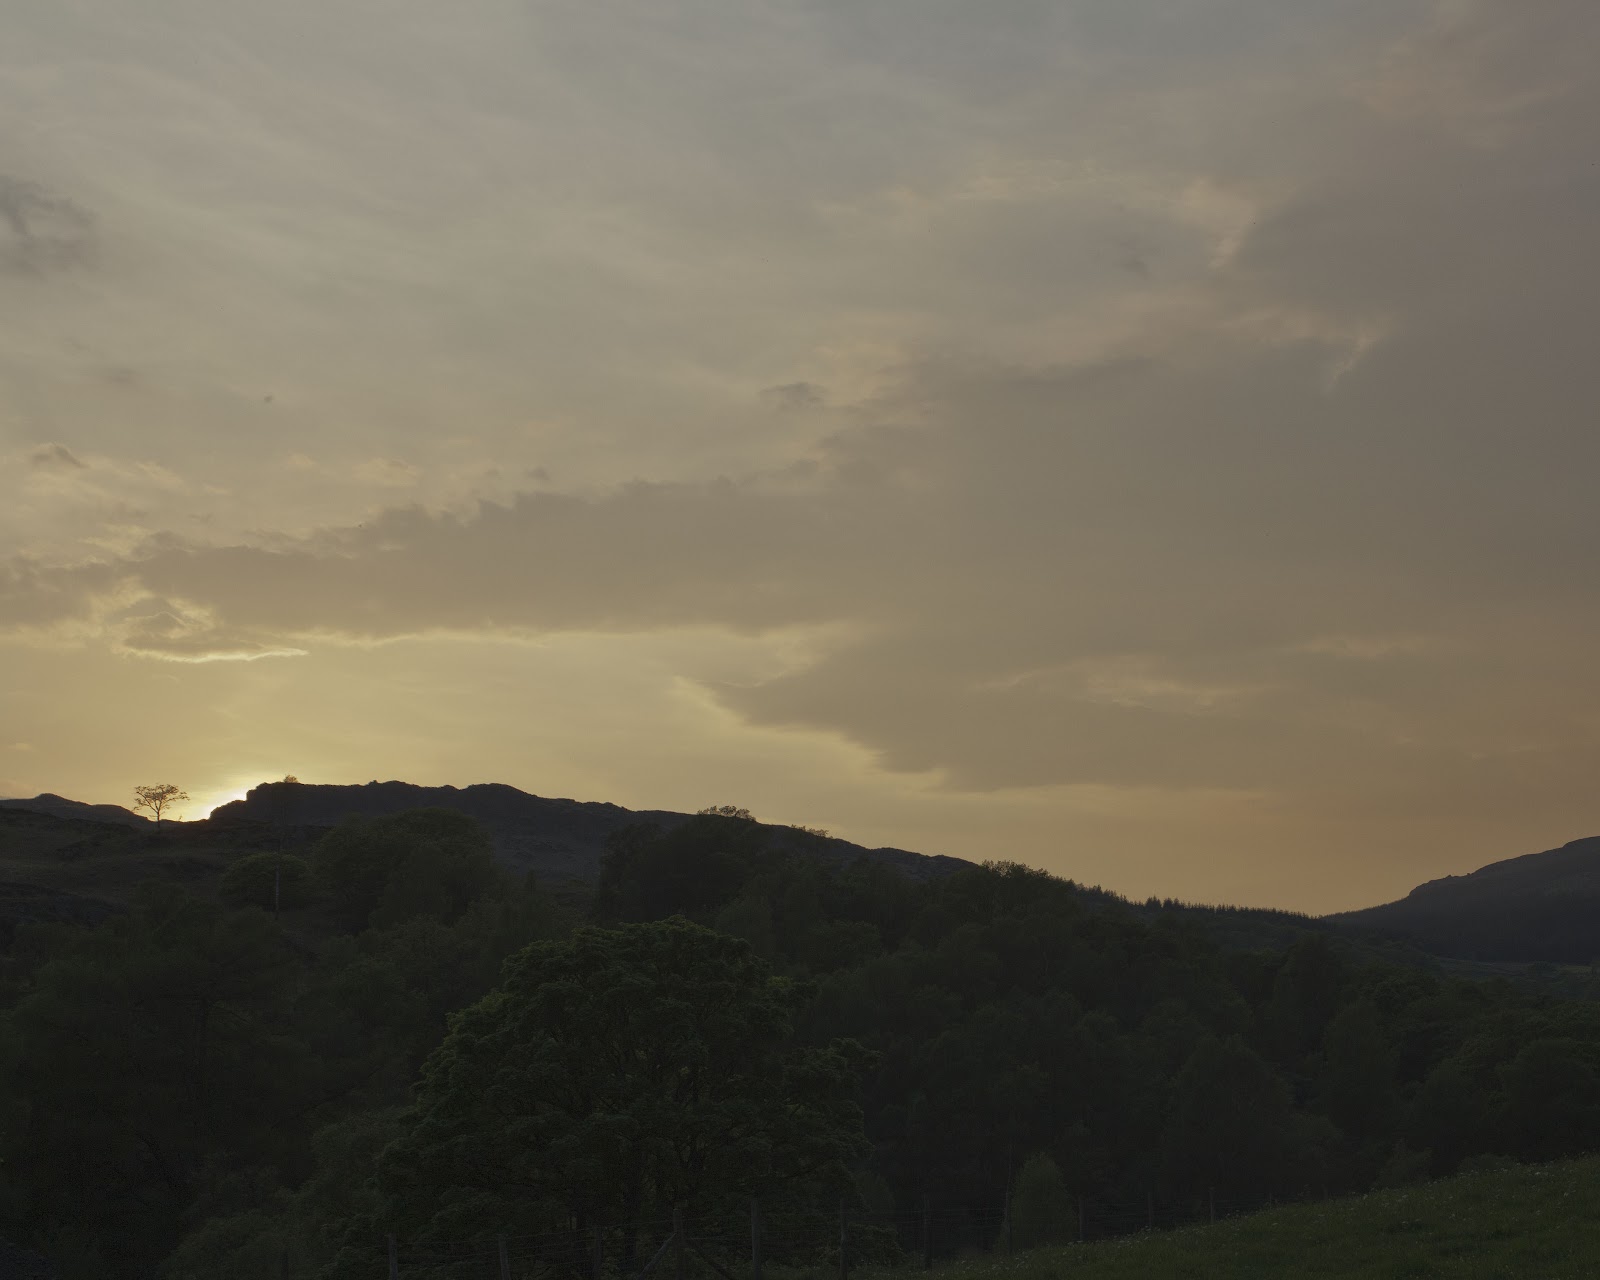

A further 32 seconds has elapsed. I have aimed the camera slightly to the right of the previous images as can be seen by the position of the tree on the brow of the hills. I did this because I wanted to record a greater area of the sky which was enabled by the shape of the horizon line that dipped down to the right.


50 seconds has elapsed. I was using a 70-300mm lens fitted with a polarising filter and here I have panned back slightly to include the trees to the extreme right and again shoot more sky


Just under 2 minutes have elapsed. Here I have cropped the image to take advantage of the tree on the brow of the hill. During the shoot I had not really noticed this feature as I was concentrating on the light as it changed but 'discovered' it when processing the images. This shot is my particular favourite.


The time now is 20.38.33 (the value of EXIF data!). Fourteen minutes and 14 seconds after I began taking the images. The sun has gone down below the hills and the sky is at its most dramatic.

All images were RAW shots and have been enhanced in exactly the same way - they were all cropped to be of the same size and sharpened to the same degree. There was no saturation or vibrance added.

It is worth noting that the drama of the sky was not so noticeable to the naked eye and it was not until I enhanced them using Camera RAW that it was as evident as in the final images. 

The location of the shoot was Seathwaite in the Duddon valley in the Lake District. The day was glorious throughout and the evening was a special gift. Earlier in the morning I had tripped and like all good photographers decided to save my camera rather than myself with the result I cracked a couple of ribs. In addition I failed to save the camera although the damage was restricted to the 50mm prime lens I was using at the time. I then got into trouble from my wife for failing to save myself! These shots and the others I got during the day made it all worthwhile.


Project 11 - The Colour of Daylight

I have read through the material several times but still cannot work out what I am supposed to do. I realise that it is about film use and I use only digital and that changing the colours in the original image with the use of filters can be mimicked in Photoshop or Lightroom with no difficulty. As I also use Silver Efx Pro when creating black and white images where the software provides a range of filters the material was interesting but not directly applicable.

Project 14 Changing Light Changing Views


Early Morning


Mid-morning


Noon


Mid Afternoon


Evening

The first image was taken about 6.00 a.m. and the whole valley was shrouded in mist. I chose the shot shown because I was able to include some detail as provided by the gate and trees. As to be expected the light was very soft and in most directions including towards the sun were bereft of detail. The conditions dictated the direction in which the rest of the shots throughout the day would be taken.

The second image was taken at approximately 9.00.a.m. and I chose almost the same shot as the earlier one although I had zoomed back from the gate to provide foreground and give a better sense of scale within the image. The third image was taken at noon. There was some loss of detail and colour in the image compared with image 2 but less than I had thought would be the case. The only marked difference is in the visibility of the wall in the bottom right of the image as the sun moved and took away the shadows in that area.

The mid-afternoon shot was taken at approximately 3.00.p.m. I decided to change the viewpoint and to use the light at that time and the shadows created to give some sense of the hills beyond the field shown. It is shot to the right of the preceding images to include the part of the wall in the  foreground and the trees at the end of the field.

The final image was taken at approximately 9.00.p.m. I took a number of shots over a period of about half an hour as the sun sank slowly behind the hills. The original image was taken to include all the hills  shown in the early images but when processing the image I decided to crop closely to make the tree the focal point. I had switched lens at this point and was using a 70 - 300mm lens that 'cut-out' the valley between me and the shot. The sky did not appear this colour to the naked eye and it was only when I was working on the image did the colours shown become obvious. No saturation was used and the colour is  how the camera 'saw' the image. I had a polarising filter on the lens and I presume that this helped in capturing the colour in the sky.

I had done a similar exercise in The Art of Photography Course but with a fixed spot for the camera. I found this exercise more interesting because of the challenges presented and the questions asked. There seemed to an infinite number of variations on a theme and the choice at the time of individual shots and subsequently of those to be in this blog forced to me think. No bad thing!


Sunday, 3 June 2012

Project 29 - Photographing a well known image

I chose for this project a photograph taken by T Leslie Hawkes in 1989 of Seathwaite Church in the Duddon Valley in the Lake District. The particular print was on a wall in a cottage that we had rented for a few days which was located in the Duddon Valley approximately a mile from the Church. Its attraction lay in part in the connection the cottage had with the Church - the cottage was the home of the rector -
 but also in the composition used by the original photographer. He has used the house on the left and the wall on the right to draw the viewer into the image and in particular towards the door of the Church. The Church forms approximately a third of the image but is the dominant feature. Hawkes chose not to take a photograph that contained more of the Church building and its surrounds (easily attainable by going round to the other side of the Church) but to provide just enough information for the viewer to know that it was a Church.


In taking this image I used the same house and the wall to position the camera, using a 24-70mm lens to zoom in to capture the same composition as the original. The two differences are the 'round' hedge at the corner of the house and the wall on the right from the foreground to the gate is higher by three courses of stones. The windows in the house have been replaced but with similar sash type windows. The only other discernible difference is the foliage behind the Church which was more abundant in the original photograph.

Why do I think Hawkes chose this particular viewpoint? I would suggest that he wanted to find a balance between the main subject - the Church - and the surrounds so that both were seen in context. A larger view of the Church from the other side of the Church would have taken it out of context as it would have been impossible to include anything but trees. It was important to link the Church with the community it served and this was achieved by including just a small part of the house on the left.

I took the following image approximately 75 yards from the Church using the 24 - 70mm wide angle lens to include as much as possible. The road behind the photographer after this point begins to bend and a reasonable view of the Church became more difficult. Further the inclusion of more buildings both on the left and the right would have diminished the impact of the main object evidence of which is beginning to show in the following image.


What did I get from this project? I visited a number of sites in the Lake District of areas that had been photographed (which is most of it) and it was a learning experience to try to work out from where the image I had in front of me had been taken. It was difficult to find the exact spot, sometimes because of changes, but also because by the use of different lenses and later cropping the image could be achieved from a surprising number of positions. For me the more interesting part was walking round the object and trying to establish why that shot from that position. Sometimes it was obvious but on other occasions I would have chosen a different shot no doubyt because of my particular preferences.


Photographing the Lakes

Had 3 days in the Lake District 23 - 25 May in superb weather taking lots of photographs. Had my next assignment in mind and the need to work on some of the projects in the Course material. Reasonably successful particularly with the Assignment Images (the connecting theme being 'water') and some material for the projects. Spent the last week including today sifting through all the photographs taken to select suitable ones to meet the various needs.

I have to admit that I am still struggling to make sense of the projects. Not because I don't understand them but because they are, naturally, all weather dependent. For example there is the one where there is a requirement to take shots of the same general area at different times during a day. The need here was for a good day weather wise. O.K. I was lucky but I had tried on several occasions prior to this to get the photographs without success. For some reason (?my age) I cannot remember all the things I am supposed to achieve in one project. I have yet to find an workable answer. The Course book is way too bulky to take on the actual photo-shoot and I tried making cards with a precis of what was required. Worked to a certain extent but then when re-reading the Course material I sometimes found, within the general text, some requirement that I had missed. I don't struggle so much with the assignments because they are contained on one page and are usually succinct. Unfortunately you cannot say that about the projects. Never mind I will get there eventually and its all good practice.

Sunday, 13 May 2012

A day with the RPS

Spent most of the day at an Advisory Day for people thinking about applying for Licentiateship and Associateship Distinctions. Not involved myself so was able to sit back and enjoy the day. As to be expected there was a wide variety of topics and approaches which, together with the advice given, made for a chance to see and think about other people's work. Of particular interest was the Associate submissions that offered a number of approaches from the straightforward, almost shots of record, to the abstract impressionism effects that can be created in Photoshop. Discussion led by the two advisers was most helpful. Not surprisingly, given present fashions there was very little if any Landscape work but there are signs that this is changing.

Wednesday, 2 May 2012

On reflection

It is probably a good time to review what I have got from the Course so far and whether my photography has improved. Although the selected images were not taken for a specific purpose they are of very recent vintage and the lack of purpose, other than enjoying taking them may offer a truer reflection of my progress.

All images were taken near or in the village of Malham  of Malham Cove fame. I decided against a visit to the Cove because two coach-loads of tourists had just arrived and were making their way to the Cove. I thought the chances of a set of good images was remote.


The attraction of this image was the mist in the valley in the far distance. The sky was uninteresting and so I decided to crop it out almost completely. I used the wall, rocks and stones in the foreground to direct the viewer's eye into the image. Coincidentally this helped to emphasise the vastness of the scene and its rugged nature.


A very similar image to the first one but this time I have made the foreground the dominant feature with the aim of underlining the nature of the terrain. Again there is a sense of vastness and this time I kept a small part of the sky although cropping most of it out of the frame.

The two images were taken from almost the same spot but I walked round to find the images that I wanted using my feet rather than moving the camera on the tripod. Although now this seems an obvious thing to do I have to admit it has only become part of techniques since starting the Course. As landscapes give us almost as much time as we want (it doesn't go anywhere although the light may change) I feel much more comfortable reconnoitring the area before putting the camera to my eye.


This image was taken in the village of Malham that attracts a lot of visitors. I did consider waiting patiently for the bridge to clear but then thought that the purpose of the bridge would best be demonstrated by including some people. They give scale to the image allowing the viewer to get some sense of the size of the bridge.


This bridge is just a little further downstream from the one above. It's interest for me was its construction that is of a simple pack bridge suggesting that it is of considerable age. On reflection I feel that I should have included at least one person to offer scale.


The attraction for me and the result that I aimed for was the curve of the wall taking the eye to the distant hills. I deliberately left part of the path showing to emphasise that there was a way and that the wall was a boundary rather than a barrier.


I have included this image because I am unsure that it works. The path was included to encourage the viewer to 'look' into the image but the problem is that it continues out of the image on the right hand side. I could argue that the gate offers  further progress but as it is closed it too is a barrier. It may have worked better if I had cropped the image so that the right hand side of the gate was almost on the edge of the image thus removing the edge of the path. I have shown the image to a number of people getting   differing reactions.


I have included these two images as they are examples of placing people in the image to give a sense of scale. I had noted in earlier work that I went to great lengths to keep people out of the picture but now feel that it is sometimes necessary where distance clues are limited in the natural environment.


As I have previously said in my blogs or submitted work I am always attracted to water. I am not a lover of the 'velvet' water that seems to be part of everyones response to water and much prefer the natural look. If I am honest I do not think this is a great image but I am not sure why. 


I like this image although if pressed I could not really say why apart from it is representative of the countryside around Malham and is a reminder of a great afternoon taking photographs.

Having worked through these and the others that I took on the same day I feel that I can argue that there are signs of improveemnt. Certainly I take a great deal more time in deciding the best approach to any shot both before I pick up the camera and then when I have the viewfinder to my eye. I believe that this has given me a better understanding of composition and the benefits of thinking about where the chosen main element(s) of the picture should be placed. I still have some way to go but at least I feel that I am heading in the right direction.